When the Red Giant VFX Suite for After Effects was introduced last year, the big question on everyone’s mind was whether it would really give the end user the ability to take their compositing and effects work to the next level. Post-production expert Alistair Rankine, who has been testing the Red Giant VFX Suite for the last few months, gives us his verdict on whether this is indeed a game changer or just another market launch.
Alistair Rankine is a post production manager, colourist and VFX artist working in both the UAE and the UK.
A few months ago, Red Giant asked me to road test their new VFX Suite plug-in collection for After Effects. For those people not in the loop, Red Giant, which was founded in 2002, is one of the largest developers of After Effects Plug-ins and have an excellent reputation in both the VFX and Motion Design communities. Like many of their products, the VFX Suite bundles many of their individual plug-ins to ensure a more effective collection of VFX tools.
The VFX Suite incorporates powerful tools for compositing, chroma-keying, motion tracking, clean-up, distortion as well as lights and glow. It comes at the seemingly hefty price of $999 ($499 for students), which is actually a fair price considering what is included in the bundle.
Included in the package are the following individual plug-ins: Supercomp, Primatte Keyer 6, King Pin Tracker, Spot Clone Tracker, Optical Glow, Chromatic Displacement, Knoll Light Factory 3.1, Shadow and Reflection.
As a user of Red Giant plug-ins for some time, I have found them extremely user friendly, allowing the user to spend more time honing and refining their work rather than spending time trying to figure out how to use the actual software.
There are so many features available within the VFX Suite that it almost makes it feel like an entirely new workspace available to you right there within After Effects.
Supercomp

Users of other Red Giant plug-ins such as Trapcode and Magic Bullet will be familiar with the Supercomp panel. It is basically a “looks Builder” that allows the user to drag/drop, reorder and adjust effect parameters to the finest detail. It eliminates the need for endless pre-composing within After Effects and is extremely fast at previewing and rendering due to some clever GPU acceleration under the hood.
Supercomp allows the user to choose from an arsenal of tools such as Light Wrap, Reverse Light Wrap Edge Erode, Heat Blur, Grain Management, Edge Blend, Diffusion and many more. None of these tools are new to any professional VFX Compositor; however, this has a much more user-friendly GUI than products such as Flame and Nuke offer.
There are also excellent colour correction and re-grain tools essential to creating realistic compositions that allow for greater refinement of the foreground and mattes created in the Primatte Keyer.
One of my favourite features within Supercomp is “Context Aware Effects”. This basically allows any changes that you have made within your composition to be rippled throughout. This allows the user to swap out backgrounds, re-order layers etc and all the applied effects will automatically change with it.
All compositions within Supercomp are 32-bit floating and offer proper gamma management throughout, allowing for more realistic and seamless compositing.
I find Supercomp to be fast, efficient, accurate and relatively easy to use and understand.
Primatte

Next up is Primatte, Red Giant’s chroma key plug-in. Primatte now comes with a new interface that is much more streamlined and user friendly than previous versions. This keyer is now the best it has ever been. As with all chroma keying, the biggest challenge is usually how well the green or blue screen has been lit during the film shoot and what file format it has been shot on. I tried the keyer in various scenarios and it performed extremely well. I would never expect to pull a perfect key the first time around but the selection tool on Primatte did a good job with plenty of added tools to help refine the Matte. The Spill Killer feature works extremely well when trying to remove any blue or green reflections from characters and objects and can be a lifesaver if you are dealing with poorly lit material.
Primatte also ups its game with the inclusion of the new Core Matte function. This works well when trying to pull complex keys such as those where the subject matter has long flowing hair. The Core Matte allows solid areas within the Matte to stay solid while also helping to preserve finer detail where there are transparent edges.
All in all, the Primatte Keyer does everything it needs to at a professional level. I am a big fan of the Foundry’s Keylight Keyer and tend to use that first if I work in Nuke and After Effects. I imagine now that Red Giant has updated Primatte and added features such as the Core Matte that allow more advanced refinement along with the ability to refine the process even further inside of Supercomp, I will be more inclined to use Primatte as my go-to Keyer inside of After Effects.
VFX King Pin Tracker
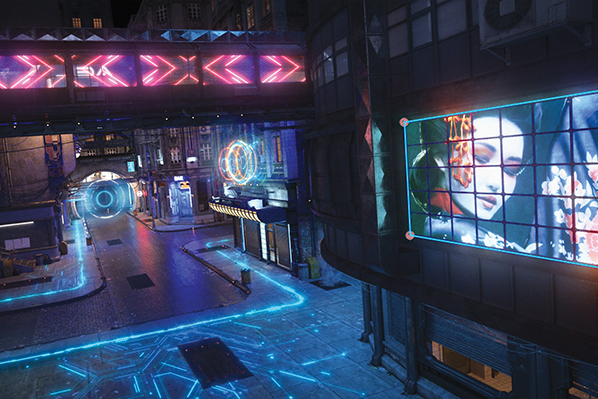
Motion Tracking has vastly improved over the years with software apps such as Mocha leading the way in planar tracking and others like Nuke and Flame developing their own planar trackers.
Red Giant has now released its own planar tracker within the VFX Suite. The new tracker is extremely fast and robust and offers first-class planar tracking right within After Effects. Red Giant even claims that they have had to add their own “results window” due to it being so fast that the After Effects Comp window can’t keep up with the speed of the tracker.
Having used the King Pin Tracker in various scenarios, I am impressed. It is, in fact, very fast and accurate. I would like to see it open in a separate interface in the same way that Mocha does rather than using the After Effects GUI and control panels. That said, it works extremely well and is easy to use.
Something that has always been frustrating within After Effects is the ability to work with Corner Pins when tracking, making it difficult to corner pin nonrectangular objects. The ability to “pin any shape” helps to overcome this allowing the end user to choose which part of the shape will become the basis for the corner pin.
This is extremely useful and saves a huge amount of time and effort when trying to accurately incorporate objects into your match moving. Combine this with excellent refinement tools to scale rotate, reposition and offset your tracked object along with the ability to add motion blur that matches the Motion Blur within your After Effects Comp and you have a planar tracker that offers high-quality sampling and the ability to choose a balance of smooth to sharp rendering depending on the needs of the Composite.
I have always been a huge fan of Mocha for planar tracking. I don’t see myself moving away from it completely as I am very familiar with the interface, knowing easily what I can and can’t achieve when I use it. I, however, do now see myself moving between Mocha and The King Pin Tracker depending on the needs of the shot in question. The King Pin Tracker really holds its own and as I believe it will only get better with future releases. One wish, a less After Effects-like control panel.
Spot Clone Tracker
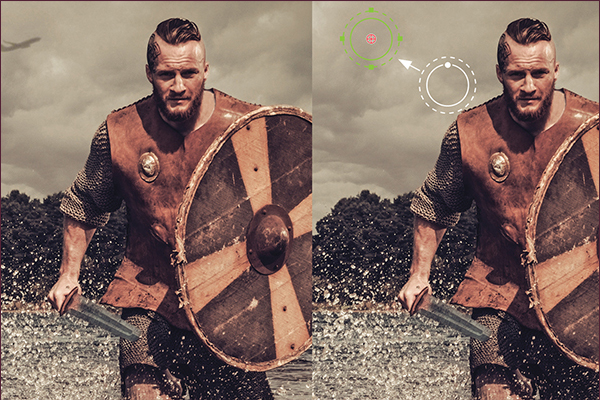
The ability to remove unwanted objects from scenes quickly and easily is essential for every compositor. Over the years, this has become a less time-intensive process with the ability to clone and track objects becoming more refined as technologies advance. The Spot Cloner allows you to clone areas of a shot and then track them to another area of the same image in order to remove items that you don’t want in the shot. It does this with ease and can easily overcome the challenges of different lighting and textures between the source image and the result. It offers six different methods of cloning and repairing, all of which allow manual adjustment for further refinement.
It would be great to see both the Kin Pin Tracker and Spot Cloner Tracker incorporated into one Individual Tracker so that all the VFX Suites trackers are in the same place with their own custom user interface.
Since I have had the VFX Suite to road test, I have used the Spot Cloner Tracker daily. Like all object cloning and removal tools, there isn’t a magic button that handles the process automatically. You will still need to understand the processes of what you are trying to achieve on a shot-by-shot basis and understand how to refine the process using the tools provided.
Knoll Light Factory 3.1

The newly updated Knoll Light factory is now 42 times faster thanks to being run on the GPU and comes with more than 200 fully customisable presets, 99 of which are based on effects seen in films from the 1960s to the present day. It uses a combination of the After Effects user interface and its own pop-up GUI called the Knoll Factory Lens Designer. As with Supercomp, this resembles the looks builder in Red Giants Magic Bullet Suite closely and is user friendly, allowing all lens flare to be fully customisable in both 2D and 3D.
New features here include automated behaviours such as pulsing, flickering and strobing. Lens textures allow the user to add more realism to their lens flares by adding additional dust and scratches.
Working with the Light Factory is extremely intuitive and fast. It provides exceptional results both for VFX and Motion Design work. Not many plug-ins get it right when it comes to Lens Flares, but Red Giant has done well with the latest version of Knoll Light Factory.
Chromatic Displacement
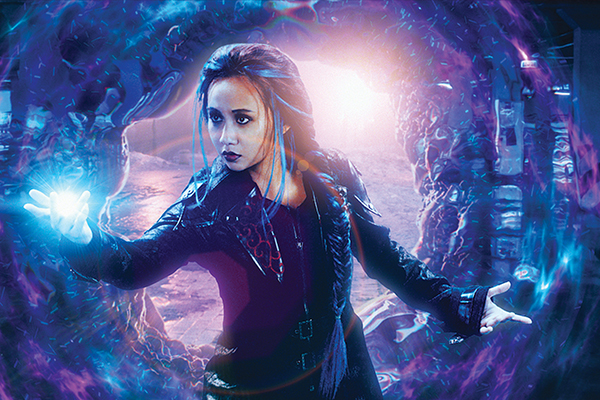
The Chromatic Displacement plug-in boasts full GPU acceleration with the ability to render in CPU mode should you not have access to GPU rendering. Again, this plug-in is incredibly fast.
Chromatic Displacement uses one layer to displace the pixels of another, while smoothly separating out the colours. Unlike the Displacement Map effect in After Effects, Chromatic Displacement uses the displacement image as a height map, which gives you beautiful, organic results”
This allows the user to create effects such as heat ripples, light refraction, forcefields as well as creating new and interesting ideas for motion graphics artists.
It is easy-to-use and provides stunning results. What you achieve using this plug-in will depend on your material and what you are trying to achieve. A good addition to your VFX plug-ins arsenal.
The VFX Suite also comes with the VFX Optical Glow plug-in for photo-realistic glows, VFX Shadow to allow the user to add realistic perspective shadows and VFX Reflection to add realistic shadows to your composition.
In short, having put the VFX Suite through its paces, I am awed by most of its features and its ability to deliver what it has promised. I believe from my experience with the product that Red Giant keeps the end user firmly in mind when they designing their toolset and puts a great deal of time and effort into creating plug-ins that the end user actually needs and not what they think we may need.
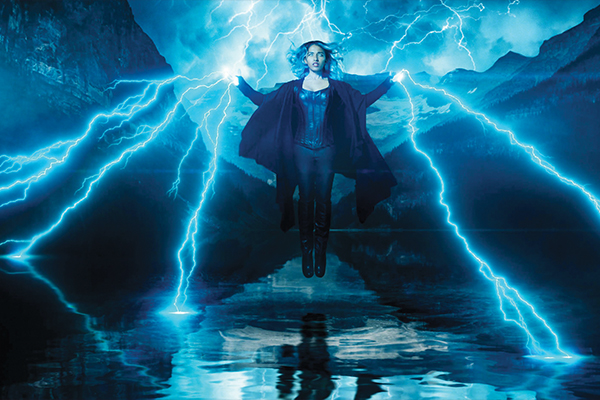
The plug-ins are extremely fast, user friendly and allow for extreme precision when creating both VFX and motion graphics and will be a welcome addition for compositors, finishing artists and motion designers alike.
Coming from a Flame and Nuke background, I have always found some of the toolsets in After Effects a little limiting. Most of the time I can find a way of achieving what I need to, but it usually involves creating endless pre-comps and toggling through hundreds of parameters in order to reach my final goal. Basically, this is like turning After Effects into After Effects on steroids.
The Verdict:
The Good
The Supercomp plug-in, the King Pin Tracker and the Spot Clone tracker are all excellent time savers when working on compositing and clean-up work.
The Bad
The $999 price tag could be a dampener for some. I don’t have a problem with it because if your work warrants using the VFX Suite daily, I imagine the financial returns will outweigh the initial costing. If your returns don’t warrant the $999 price tag then you probably don’t need it in your toolset.
My Wishlist
An entire new standalone User Interface would be great. I have always loved After Effects but have preferred the parameter controls on products such as Flame and Nuke. If there is a way of combining all of the individual plug-ins into one concise GUI, I would be extremely happy.


