Having gone through a long list of do’s and don’ts over the last few articles in this 12-part series, Matthew Collu puts together some tried and tested techniques to take your virtual production workflow to the next level.
Throughout this series, we’ve covered a menagerie of different topics, all surrounding the notion of providing valuable, educational and actionable production insights into virtual production. From terms and vocabulary to set-ups and breakdowns, the goal of truly demystifying virtual production seems to drift closer and closer with each passing month.
As we approach the final stops along this trip, I believe it’s time to apply all those insights and curate a list of real, production-ready, battle-tested virtual production techniques that take this already efficient workflow to completely new heights. These techniques aren’t the only ones, but they maximise virtual production’s potential power on-set; once aware of them, you will certainly better understand it all even before you arrive at call time.
Let’s begin with the simplest solution that yields the largest results, shall we? As I may have mentioned, the virtual production workflow depends on real-time rendering software to extend reality out into anything our brains can muster up and a virtual art department can piece together. With an extension such as this, the freedom of venturing off into any nook or cranny of that world is well within reach, to whatever degree you wish. This creates a fourth dimension of freedom that is very easily missed.
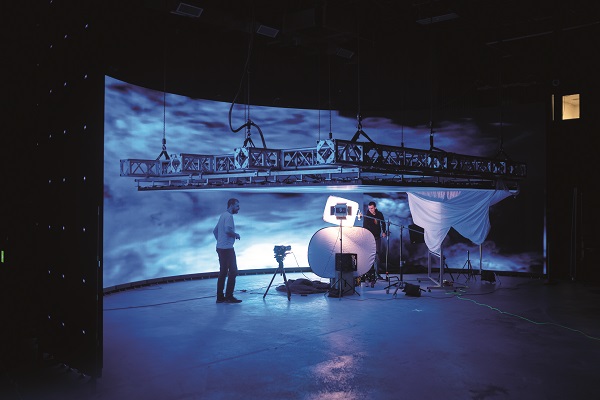
In traditional production, the camera is locked to the position of the physical world around it. If you need a wider shot, your choice is either to swap lenses or to kick back the camera altogether in the hope of capturing what you need in frame. This could be a few metres or, in extreme cases, a few miles. Simply put, we have all become accustomed to moving ourselves in relation to the very heavy real world we wish to shoot – but what about when shooting in an LED volume?
Depending on your stage of choice, the thought of being restricted to a certain viewing angle bubble can be a little intimidating and off-putting. What if you need to move farther back than the volume allows, or even the studio space itself? That’s easy: don’t. With a completely digital world, that freedom to move wherever you want is the power to choose where you want the world to be in relation to your camera – not the other way around. So instead of fighting a physical world working against you, make the digital one work for you. This is also an extremely valuable workflow insight to keep in mind, to avoid spending a ridiculous amount of production capital on a massive mega-stage, just for the illusion of usable space. If you need a better understanding of how to pick that stage, we’ve covered it previously.
Speaking of extending reality, our next technique is about blending it to the real world as seamlessly as possible, depending on the content you wish to shoot and the intricacies of the set in which your scene takes place. While building the digital world, assets are used and constructed to flesh out whichever setting the production needs. Typically, if the environment plays well on camera and no foreground set is required, that should be more than enough to begin the rest of the set-up for your shots.
However, sometimes your digital world needs to blend with a physical set. Maybe one with trees and leaves, or specific scatter terrain. How do you get the digital terrain to look like the real one, you ask? That’s also easy: don’t. Making something look exactly like something else is far more complicated than simply having it be the same, wouldn’t you say?
Luckily enough, a lot of others have said that as well, leading to the use of asset scanning. With the correct preparation, scanning the physical assets to create 3D versions is leagues above the rest when it comes to blending two worlds into one. The assets used to build the digital world are now exactly the same as the ones used to build the real one, closing the gap between digital and physical that much further. Alternatively, this can also be done if those physical elements were already designed in a 3D application, which makes it that much easier to transition them into usable assets for real-time rendering engines. This is common in sci-fi productions, and goes a long way to making the extension of your world feel grounded and connected to the reality you’re attempting to craft.
Lastly, we arrive at the most overlooked and over-complicated technique in the virtual production handbook: light. As I’m sure you know, the LED wall kicks off a rather decent amount of light, just like your TV, computer monitor, smartphone, etc. I’d also argue that even if you haven’t read up on your innovative film production workflows, we can all surmise that LEDs are capable of projecting light.
With this light, the digital environment can cast realistic, one-to-one lighting onto the subject without the need for a recreation set-up akin to other extended reality workflows. This also allows traditional soft lighting without physical rigging or set-ups. By adding light cards to the environment or adjusting specific area brightness or contrast, you can save immense amounts of time on lighting your subject or scene. Although this doesn’t outright replace any traditional lighting set-ups, including situations where harsher and more direct light sources are needed, it can certainly save hours of rigging time on the day of production, with just a short conversation and a few clicks. Not only does this speed up production efficiency, it also saves on costs incurred for specific equipment that may not even be needed when leveraging this type of real-time software lighting.
These techniques, though seemingly obvious, are in fact some of the greatest solutions offered by virtual production. Understanding how it all works is definitely an advantage when deep diving into your next shoot, but once you’ve passed through the foggy mists of uncertainty and curiosity in how virtual production extends reality, you’ll enter the most exciting phase of your virtual production journey: bending reality.
 Matthew Collu is Studio Coordinator at The Other End, Canada. He is a visual effects artist and cinematographer with experience working in virtual production pipelines and helping production teams leverage the power of Unreal Engine and real-time software applications.


